Esta tradução é mais antiga do que a página original e poderá estar desatualizada. Veja o que foi alterado.
Traduções para esta página?:
 This page is not fully translated, yet. Please help completing the translation.
(remove this paragraph once the translation is finished)

Para facilitar o uso, enquanto estiver na vista de mapa, o seu dispositivo não vai desligar automaticamente o ecrã. Para voltar ao modo automático, para conservar energia, é necessário sair deste mesmo ecrã. No entanto, a opção de desligar e ligar manualmente o ecrã funciona de forma normal.
Os ícones apresentados na barra superior e os conteúdos escondidos no menu são distribuídos de forma dinâmica com base na resolução e orientação do seu dispositivo. Devido a este facto, poderá ser possível visualizar, mais ou menos itens no menu ou como ícones na barra superior. No caso de uma função no menu ser apresentada como ícone, poderá premir durante uns segundos o mesmo para ver a sua função.
| Ícone | Função | Desrição |
|---|---|---|
 | Informação do mapa | Apresenta o estado atual do mapa: Mapa ao vivo no caso da opção ao vivo estar ativa, Mapa se essa mesma opção estiver desligada, ou o nome de uma cache/lista a ser mostrada no mapa.Por baixo pode visualizar o numero de caches a ser apresentadas no mapa. |
| Circulo de progresso | Um indicador de progresso é apresentado quando o mapa ao vivo está a carregar informação dos servidores de geocaching e/ou da sua lista de caches. Este desaparece quando o mapa ao vivo acabar de carregar estas informações. | |
| Centrar posição | Este botão pode ser utilizado para centrar o mapa na sua posição atual. Se o mapa já estiver centrado na sua posição o ícone vai aparecer com o centro preenchido. |
|
| Seleção de vista de mapa | Utilize este botão para mudar o mapa ativo. | |
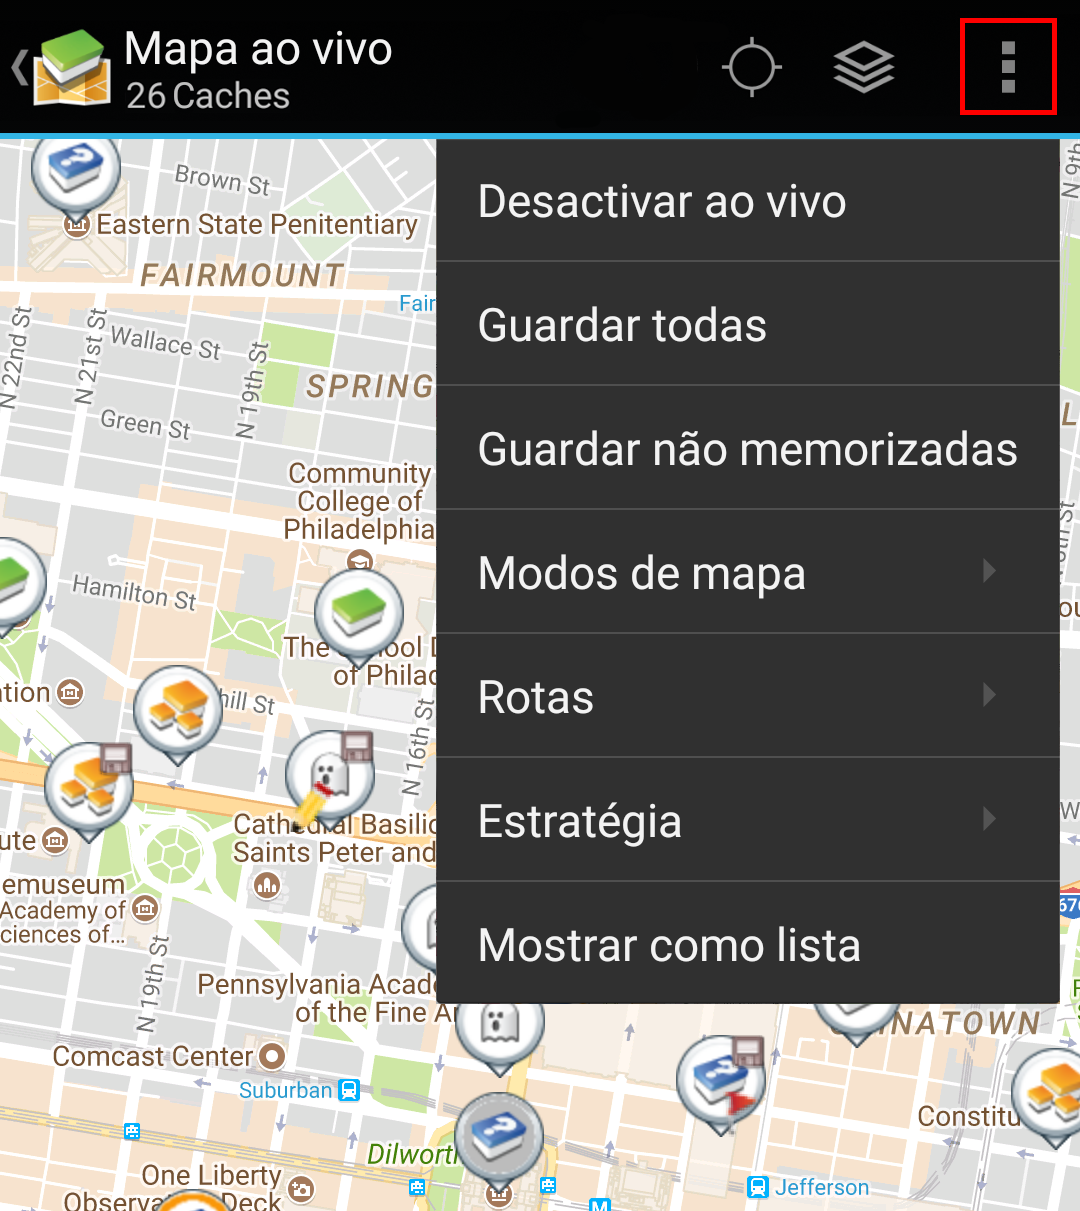
| Botão do menu de transbordo | Carregando neste botão vai abrir a lista de funções que não estão visíveis na barra superior do dispositivo, sendo apresentada em forma de lista. As funções desta lista estão também descritas nesta tabela. | |
| Ativar/desativar ao vivo | Esta função permite ativar ou desativar o mapa ao vivo. | |
| Guardar todas | Guarda todas as caches apresentadas, de momento, no mapa, na lista de caches guardadas. Caches que já estiverem guardadas serão atualizadas durante o processo. | |
| Guardar não memorizadas | Guarda todas as caches apresentadas, de momento, no mapa, na lista de caches guardadas, excepto as que já estiverem guardadas. | |
| Modos de mapa | Esta função abre um menu que contem várias opções para personalizar o mapa (Ex. esconder caches, mostrar círculos). | |
| Rotas | Esta função permite alterar o modo de rota pretendido (Ex. Linha a direito, carro, bicicleta). | |
| Mostar como lista | Esta função converte as caches apresentadas no mapa em uma lista. |
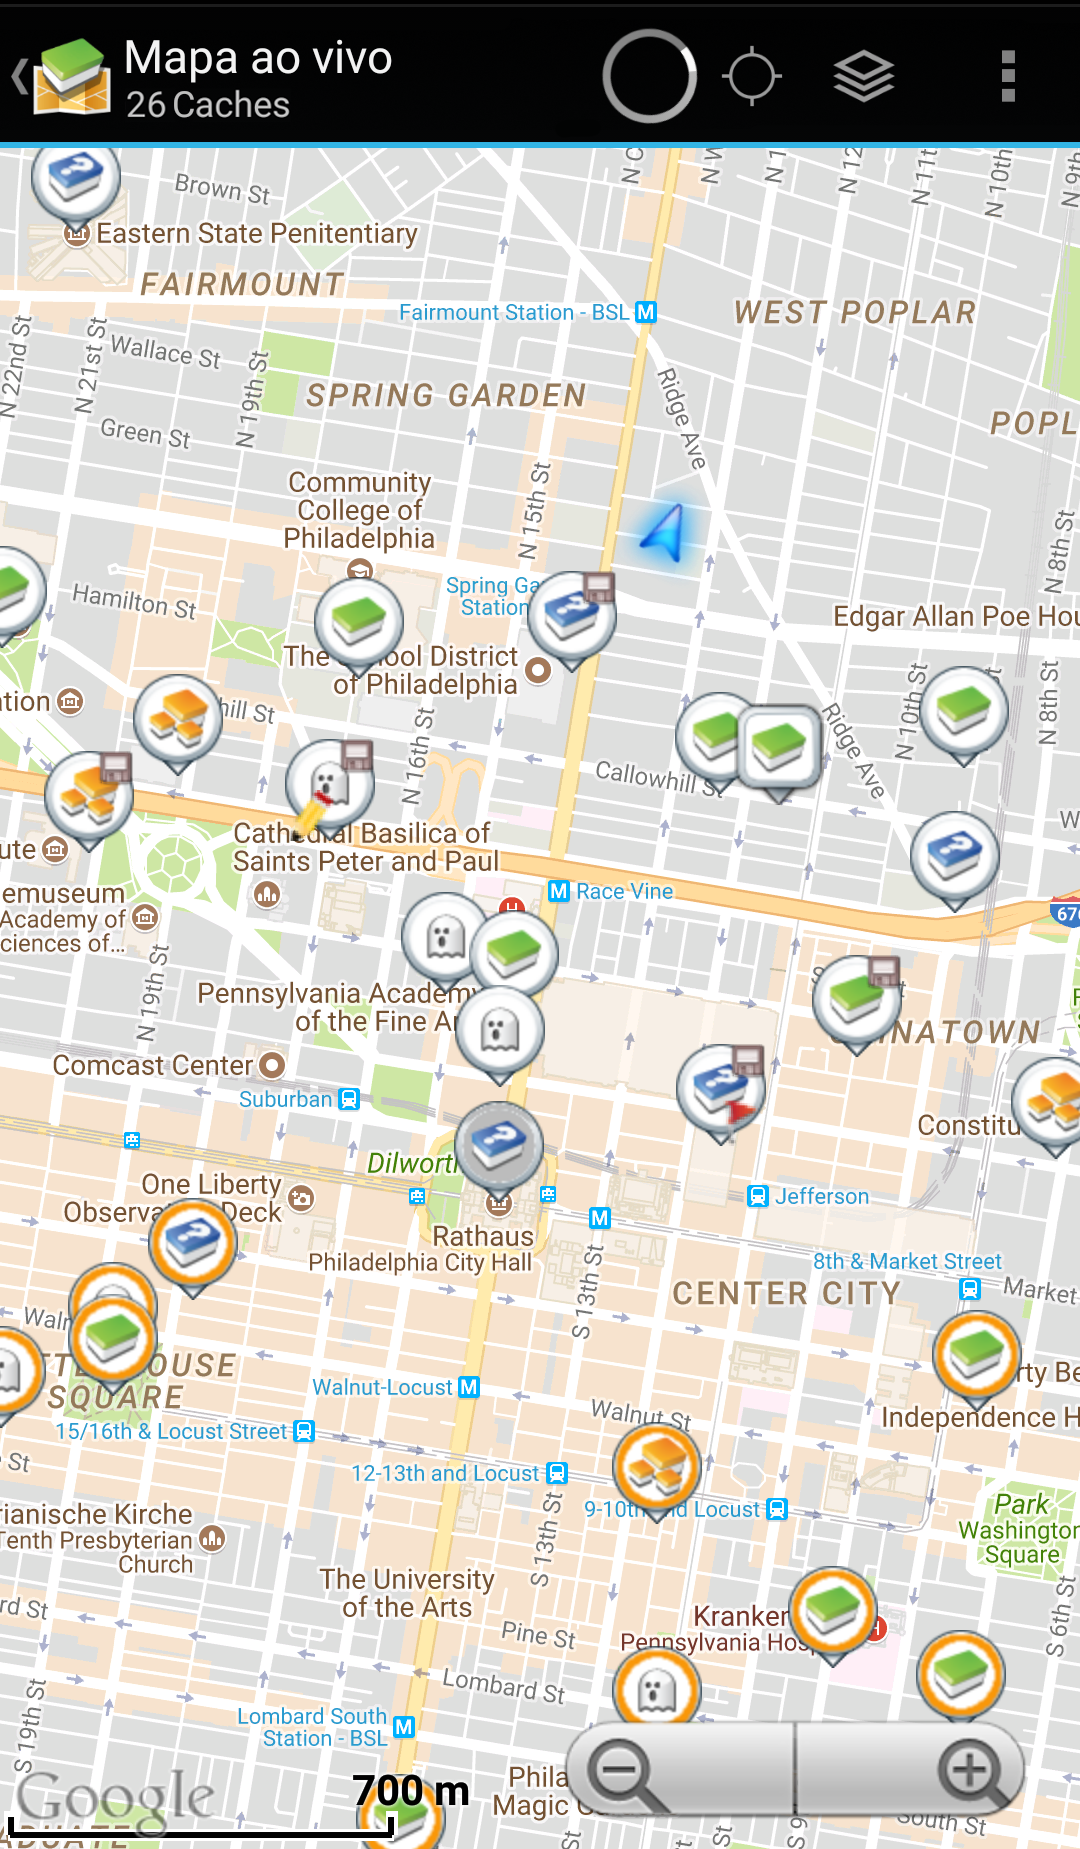
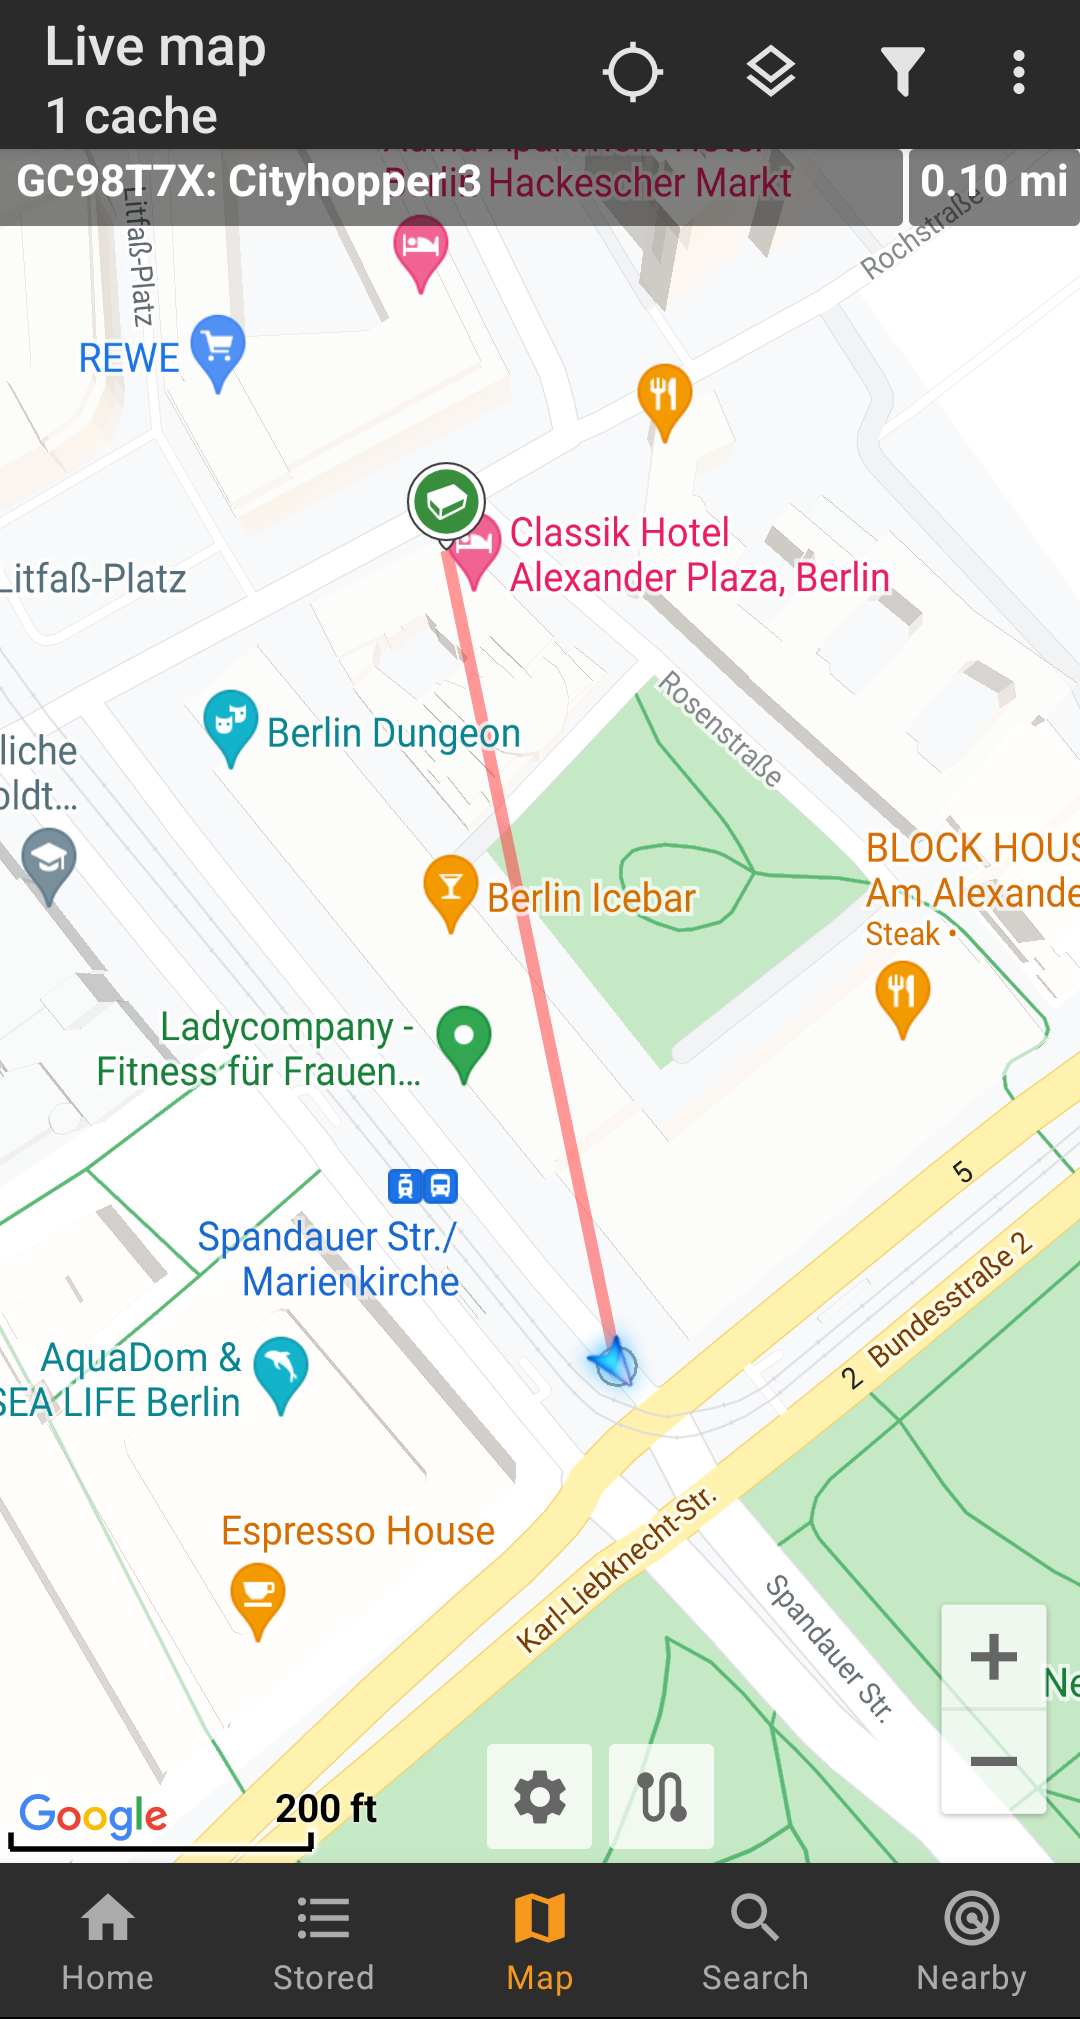
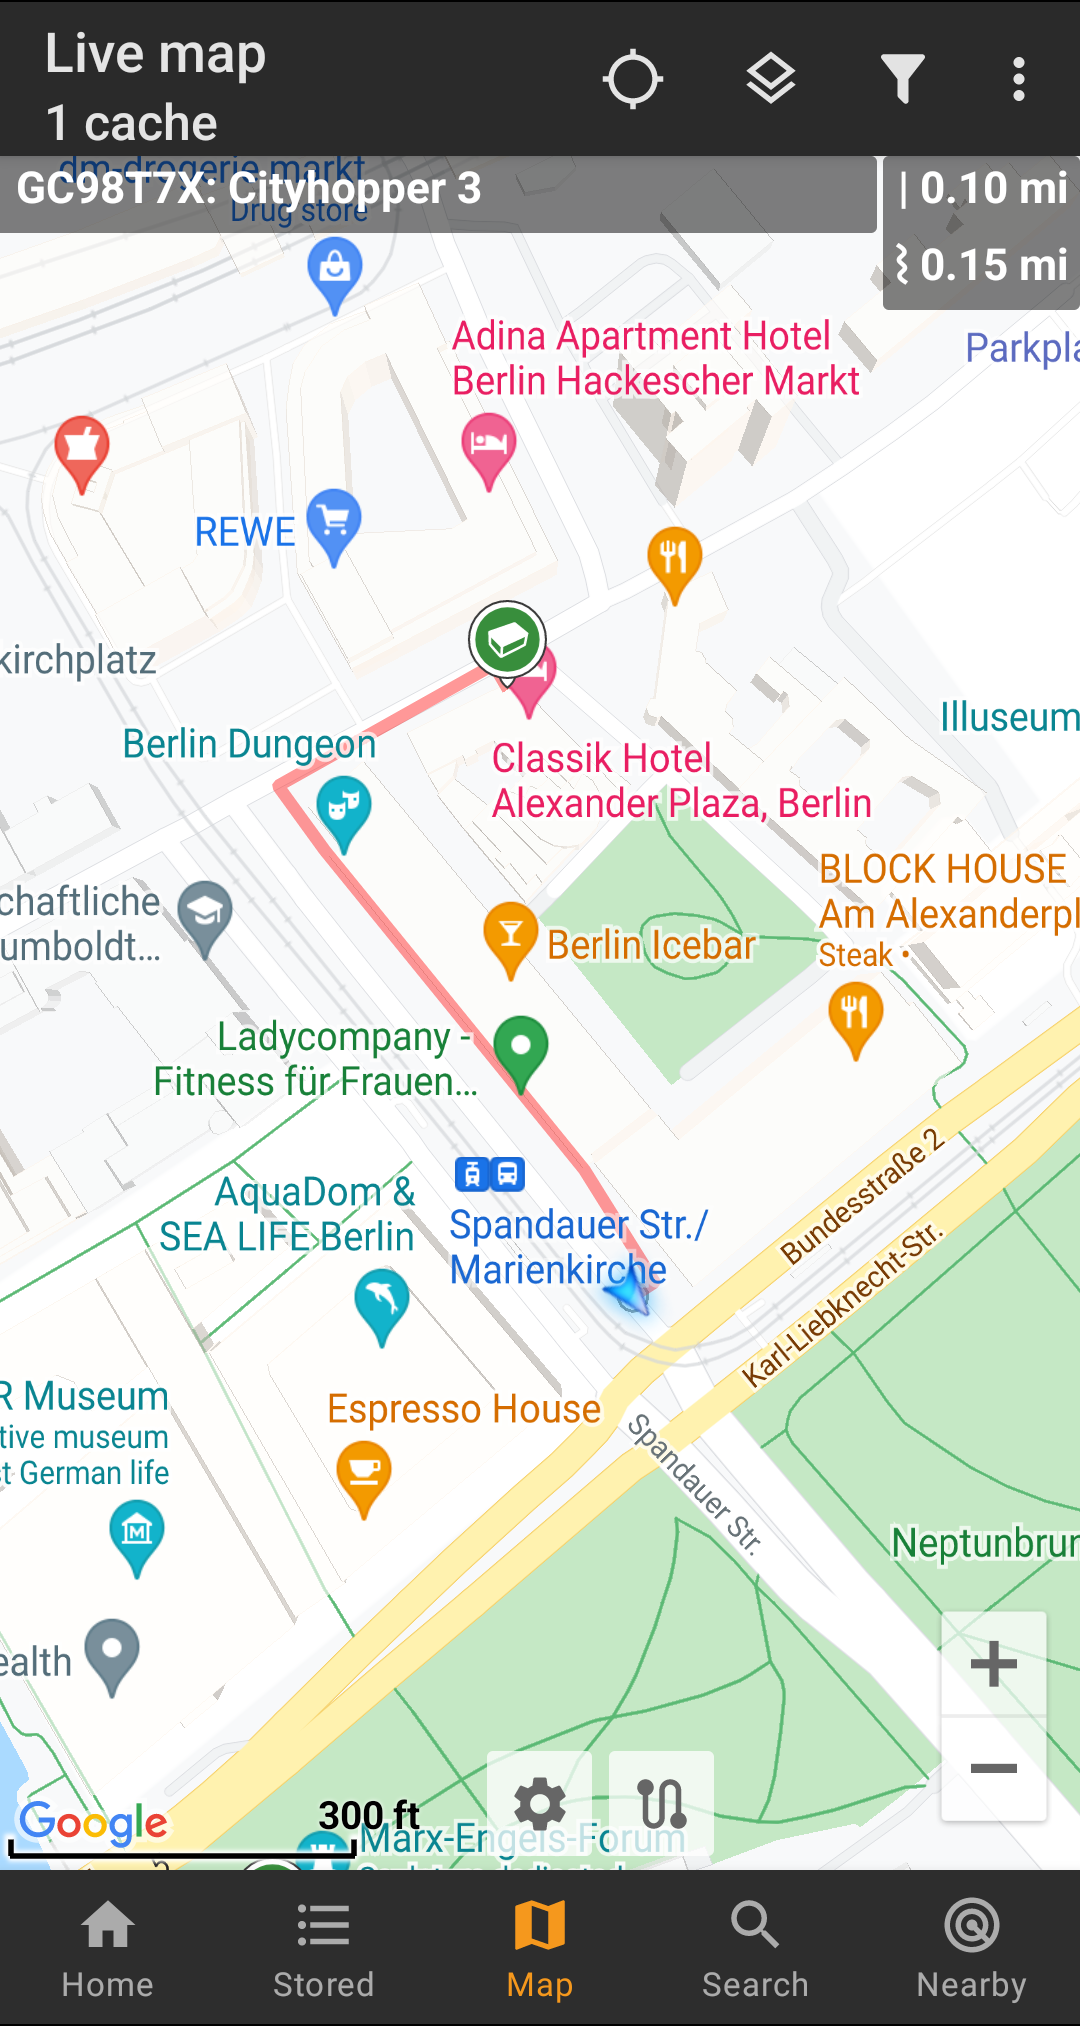
O mapa vai usar o tipo de mapa selecionado para apresentar uma vista ao vivo de todas as caches na localização selecionada.
O mapa ao vivo vai apresentar sempre uma combinação de caches carregadas ao vivo, de todos os serviço de geocaching ativos, assim como as caches guardadas nas listas.
A tabela seguinte descreve os tipos diferentes de marcadores utilizados pelo mapa ao vivo.
A tabela apenas descreve os diferentes tipos de ícones, não descrevendo os tipos de geocaches. Carregue nas ligações seguintes para obter mais informação sobre os ícones de geocaches e sobre os ícones de marcadores de geocaches utilizados no c:geo.
| Ícone | Descrição |
|---|---|
| Esta seta representa a sua posição e orientação atual no mapa. | |
| Posição de uma cache do geocaching.com. A seta aponta para a coordenada desta cache no mapa. No interior deste ícone estará o icone de cache correspondente. | |
| Posição de uma cache desativada/arquivada do geocaching.com. A seta aponta para a coordenada desta cache no mapa. No interior deste ícone estará o icone de cache correspondente. | |
| Posição de uma cache de uma plataforma opencaching. A seta aponta para a coordenada desta cache no mapa. No interior deste ícone estará o icone de cache correspondente. | |
| Posição de uma cache desativada/arquivada de uma plataforma opencaching. A seta aponta para a coordenada desta cache no mapa. No interior deste ícone estará o icone de cache correspondente. | |
| Posição de uma cache de uma outra plataforma (ex. extremcaching.com). A seta aponta para a coordenada desta cache no mapa. No interior deste ícone estará o icone de cache correspondente. |
If you tap on a cache icon on the live map the following popup windows will be shown above the map, providing additional information for the selected cache:
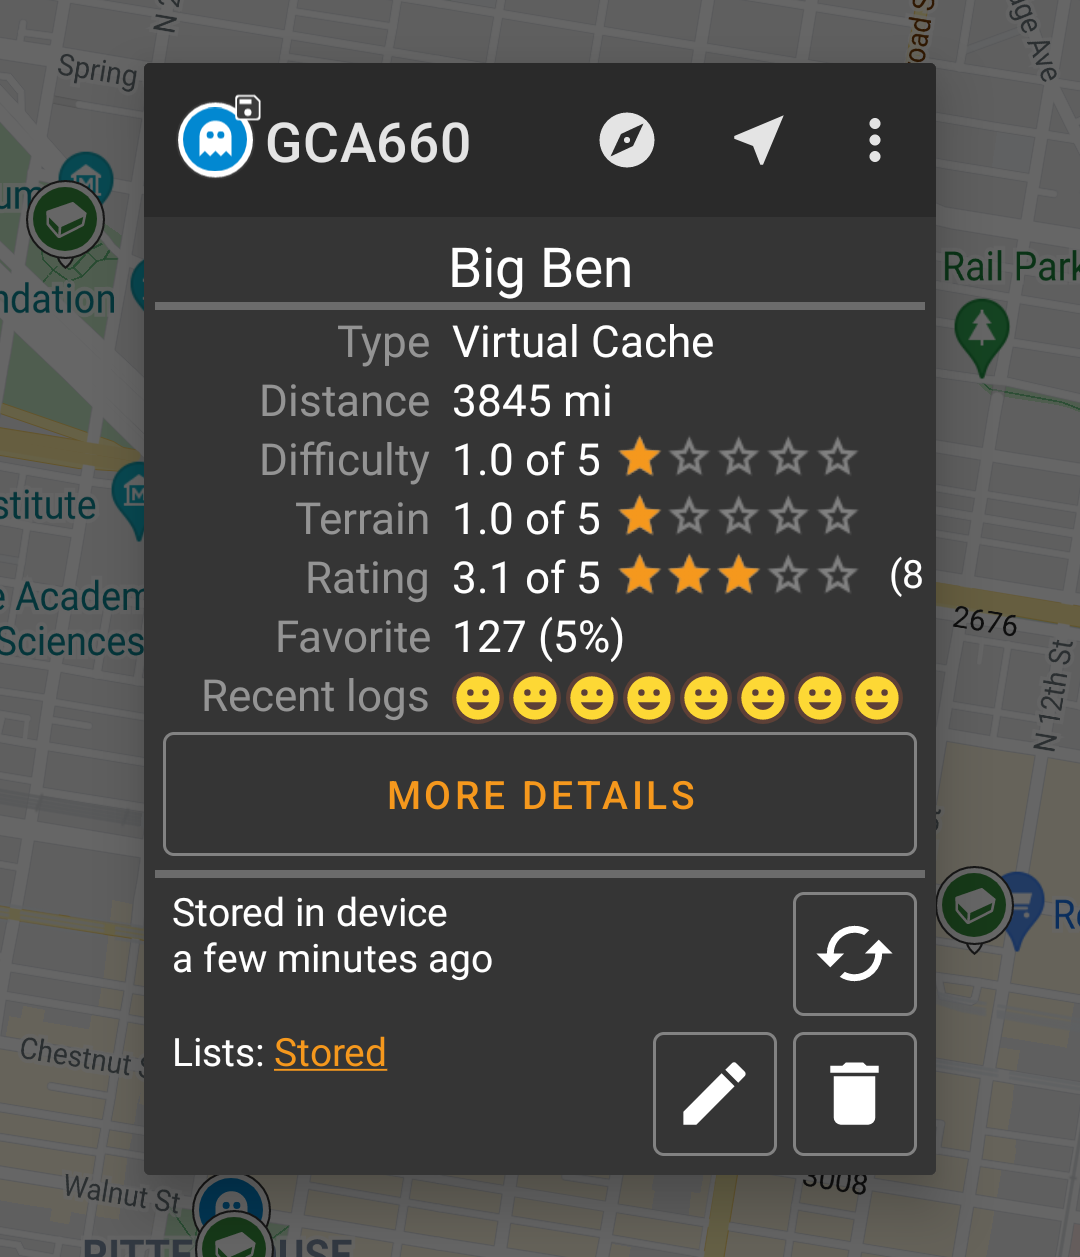
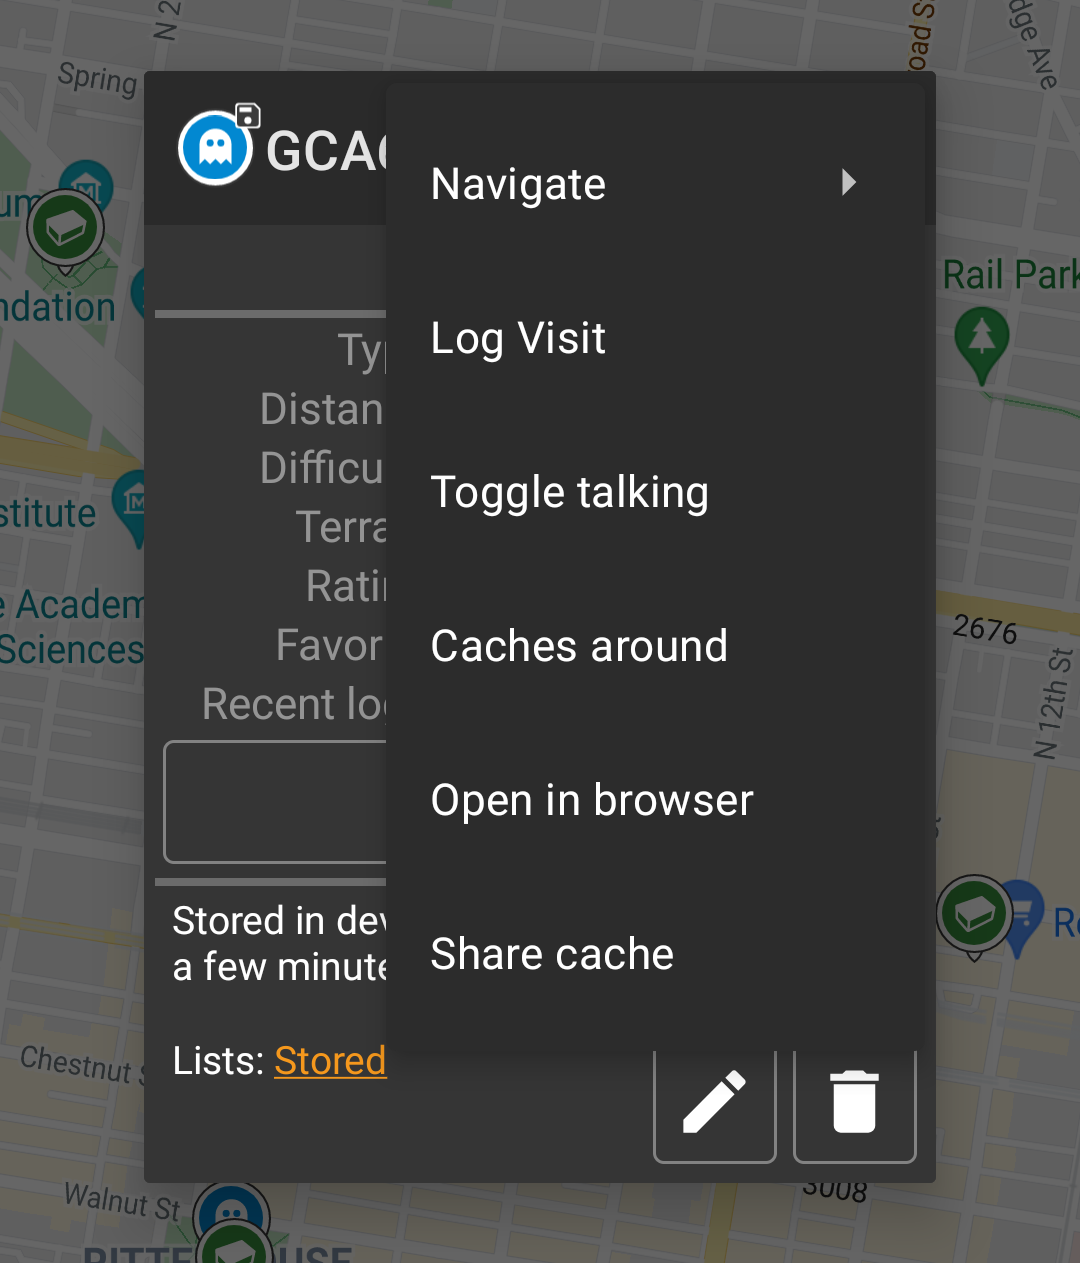
This section of the map popup provides several menu options concerning the selected cache.
| Icon/Option | Description |
|---|---|
 | Showing the Cache type icon and the geocode of the selected cache. |
| A short tap on this icon will start your default navigation tool to navigate to the selected cache. A long press will start your secondary navigation tool. |
|
| This options turns on/off the direction line/routing between your position and the position of the selected cache. | |
| This option opens a menu list with additional options also described in this table. | |
| Compass | This opens the compass for this cache. |
| Navigate | This opens the list of all available navigation tools to start one of them for this cache. |
| Log Visit | This opens the logging window to log the selected cache. |
| Toggle talking | Will start or stop the text-to-speech output of direction and distance towards the target. You can also switch off the display once talking function has been started. |
| Caches around | This option starts a nearby search around the coordinates of the selected cache and will display the results. |
| Open in browser | This option opens the cache listing on the geocaching web page using your internet browser. |
| Share Cache | Will share a link to the cache using the built-in Android share options. |
The middle section of the map popup window shows helpful information about the selected cache. Some of the information might not be shown depending on the loading status of the selected cache (e.g. due to the loading strategy).

| Heading | Description |
|---|---|
| Type | Type of the selected cache. |
| Geo code | Geo code of the selected cache. |
| Distance | Distance to the coordinates of the selected cache from your current position. |
| Difficulty | Difficulty rating of the selected cache shown as decimal value as well as graphical. |
| Terrain | Terrain rating of the selected cache shown as decimal value as well as graphical. |
| Rating | Shows the quality rating of this cache from GCVote if this service is enabled in the c:geo settings as decimal value as well as graphical. The value shown in parenthesis is the number of votes given for this cache. |
| Favorite | The amount of favorite points (geocaching.com) or recommendations (Opencaching platforms) the selected cache has been awarded. The percentage value is the amount of favorite points divided by the number of total finds. |
| Recent logs | Will visualize the log types of the most recent logs for this cache (newest on the left). |
| More details | This button will take you to the cache detail page of the selected cache providing the full information for this geocache. |
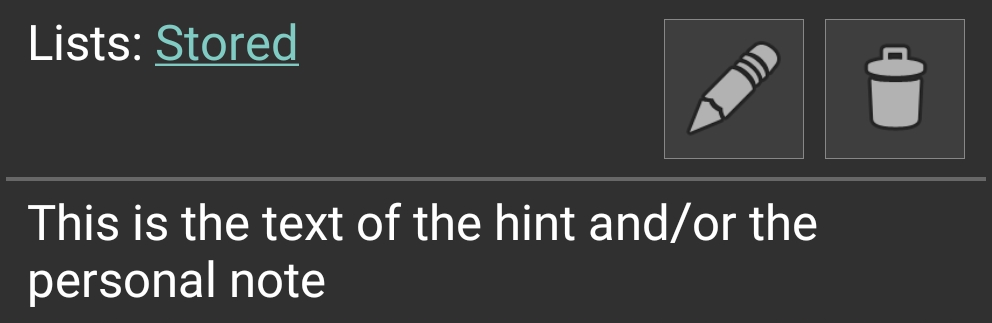
| This button is only available if the cache as a owners hint or a personal note stored. Tapping the button will display the hint and/or personal note at the bottom of the popup window. |
This section of the map popup provides several options to manage the storage state of the selected cache.
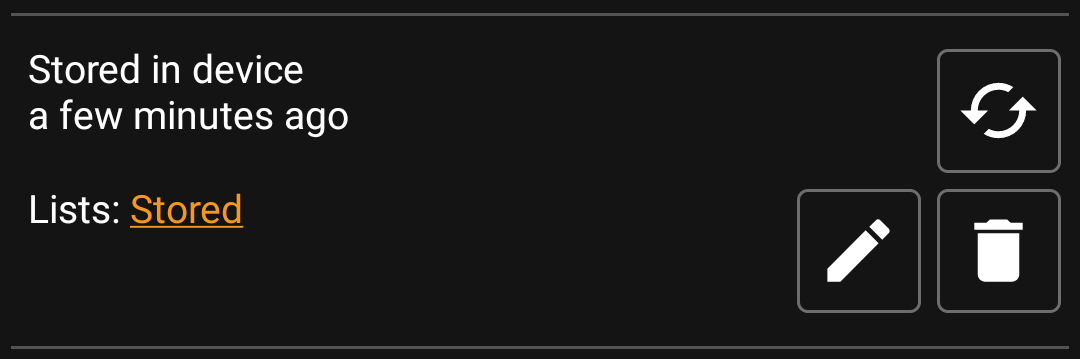
| Icon/Option | Description |
|---|---|
 | This field provides information if the selected cache is stored on your cache lists and for how long the cache is stored (i.e. gives you an indication of how up-to-date the shown details are). |
| Tapping this button will refresh the cache information by updating it from the geocaching server. | |
 | In case the selected cache is already stored in your cache lists this field shows you the list(s) it is stored in. |
| This button is only shown if the selected cache is not yet stored in your cache lists and will store it. A long press on this icon will store the cache to the last used list, instead of asking for the list. |
|
| If the selected cache is already stored in your cache lists this icon is shown and allows you to modify the list or add the cache to another list. | |
| If the selected cache is already stored in your cache lists this icon is shown and allows you to delete the cache from your lists. |
If you tapped the hint button in the cache information section of the popup window, the owners hint and/or your personal note will be shown at the bottom of the popup window. In case of a long text you can scroll this part of the popup window.
After selecting the quick settings button, which is shown on bottom center of the map the following settings screen will be shown:

| Category | Description |
|---|---|
| Show caches | Toggle whether caches are shown on the map depending on their current state. The settings used here will automatically be applied as a live filter. |
| Show waypoints | Toggle whether whether waypoints are shown in the map depedning on their type or state. |
| Show other | This section contains options to hide other elements on the map. |
| Use compact icons | With this option you can switch from the classic cache icon view to a compact view showing single caches as a colored dot only. You can set this feature to on/off and automatic mode. The automatic mode will toggle between classic and compact view depending on zoom level. |
| Routing | Here you can select the desired routing mode used to draw the direction line between your position and the chosen target cache/waypoint. Either no line, a straight line or turn-by-turn navigation for pedestrian, bike or car can be used. Turn-by-turn navigation requires an activated and configured BRouter setup. Turn-by-turn navigation requires an activated and configured BRouter setup. |
| Individual route | You can select to automatically set the start point of your individual route as target for the direction line. This item is only shown if an individual route is present on the map. |
c:geo provides several options to help you with navigation using different lines drawn on the (live) map:
To get the most out of the direction line and individual route it is recommended to use BRouter as described in the linked section of our user guide. This will enable routed lines instead of just a straight connection line.
The different line and track types are described in more detail below.
The direction line is a map line which connects your current position with a chosen target cache/waypoint. This can be either a straight line or a routed line if you have configured BRouter.
The default line color is red but line color and additional appearance parameters can be configured according to your needs within the map line customization settings.
The example below shows the typical appearance of the direction line (with and without Brouter).
| Direction line without BRouter | Direction line with BRouter |
|---|---|
 |  |
There are two ways to activate the direction line:
You have the possibility to load a GPX track/route file which is then shown on the map. For example cache owners might provide a GPX-track/route file to follow a certain route to find a cache, or you can generate such GPX track/route with other routing tools. Tracks and routes both are basically GPX files, one having a recorded track of positions (track file), the other (route file) only some waymarks, for which c:geo will route you from point to point.
The default line color is green but the line color and additional appearance parameters can be configured according to your needs within the map line customization settings.
The example below shows the typical appearance of an individual GPX track/route.

To load or unload a GPX track you have to use the map menu items below GPX track/route in your map menu:
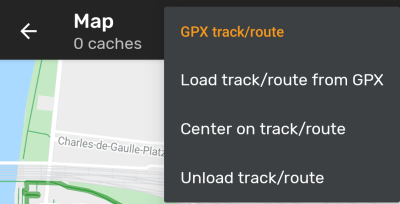
| Menu item | Description |
|---|---|
| Load track/route from GPX | Allows you to select a GPX file containing a track or route to display it on the map. |
| Center on track/route | Will move/zoom the map, so that an already loaded track/route is shown completely. |
| Unload track/route | This will remove the loaded track/route from the map. |
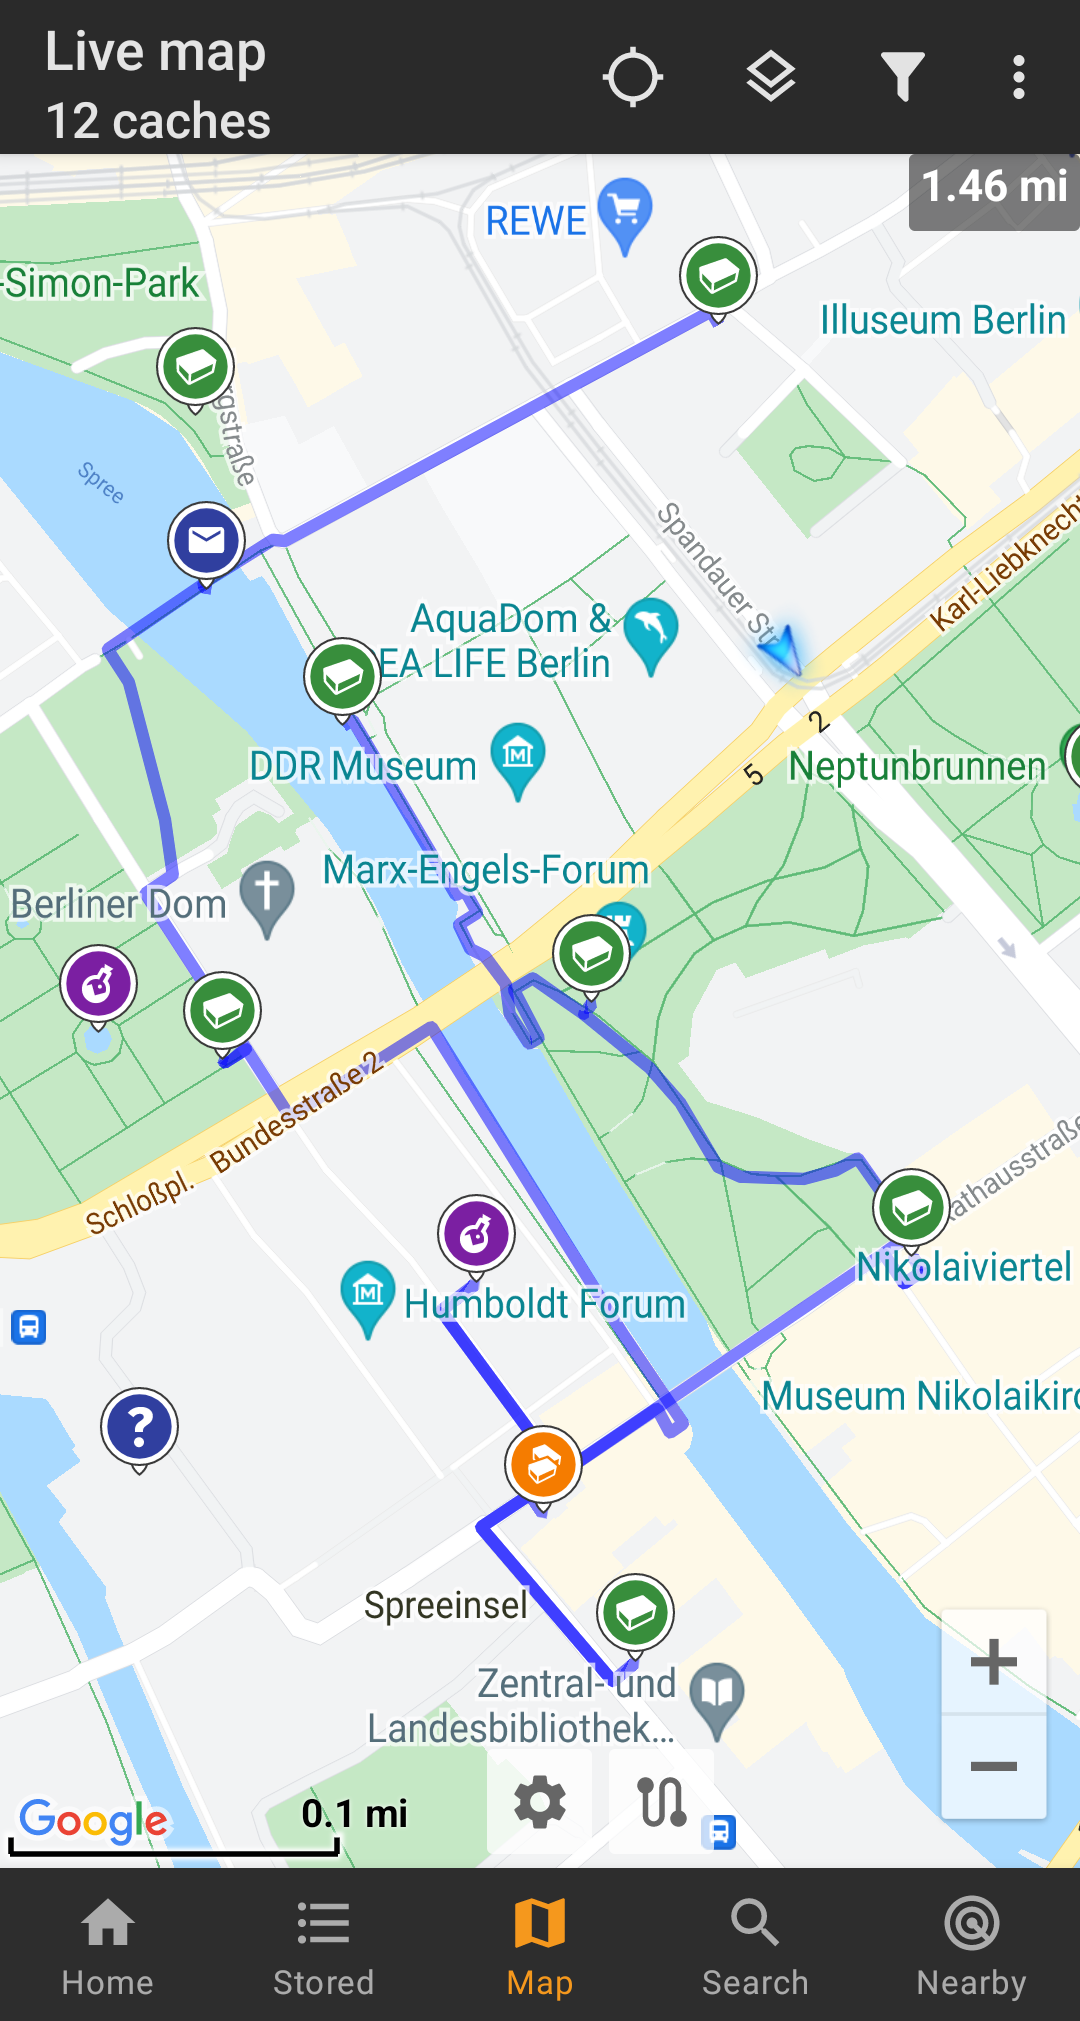
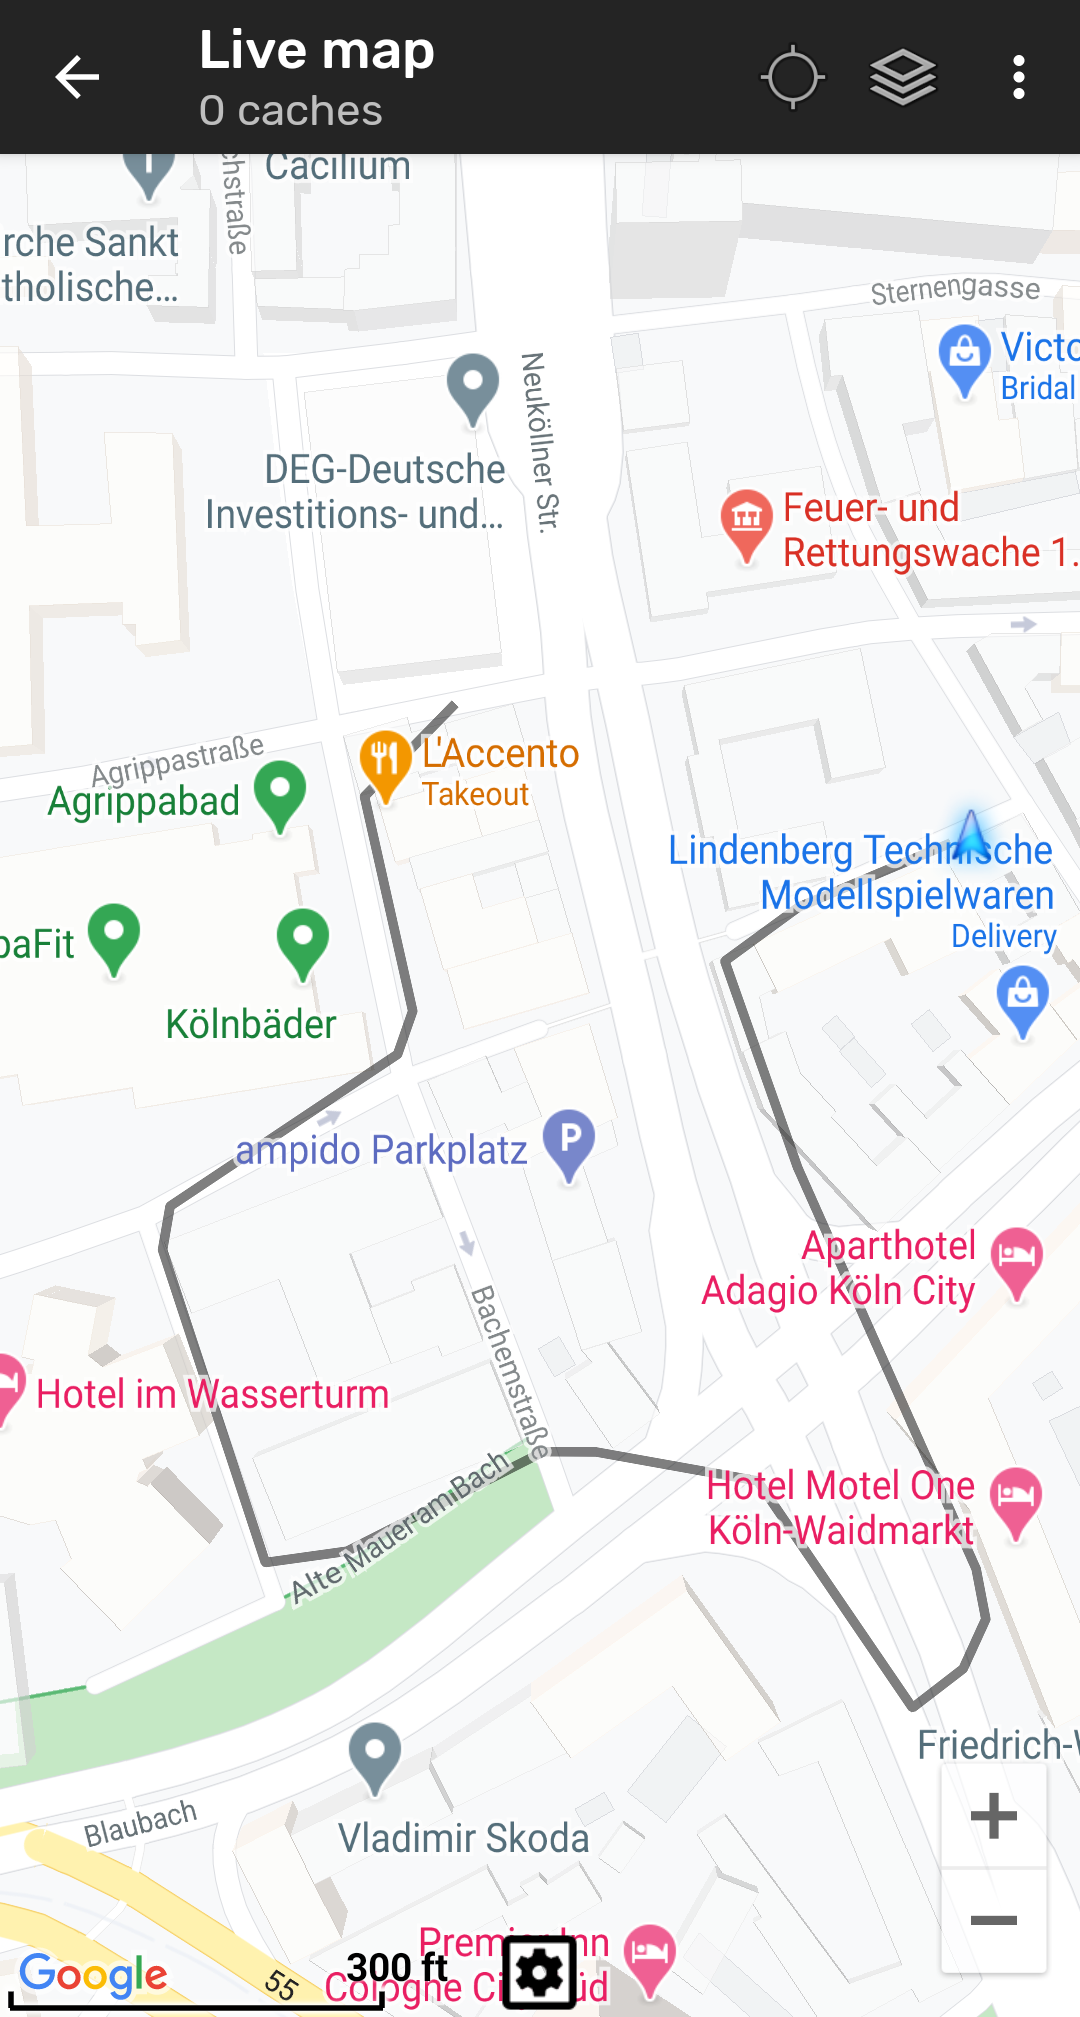
An individual route can be created by long tapping several caches/waypoints on the (live) map. A route will then be drawn between each of the selected caches/waypoints in sequence of your selection. This allows you to create a custom route between caches and can be e.g. used to plan your caching trip.
To make use of the individual route feature you need to enable the long tap function on the map in your map behavior settings.
The route points will either be connected by a straight line or a routed line if you have BRouter installed and configured. Using BRouter for this function is highly recommended to get the most out of it.
The default line color is blue but the line color and additional parameters can be configured according to your needs within the map line customization settings.
The example below shows the typical appearance of an individual route.
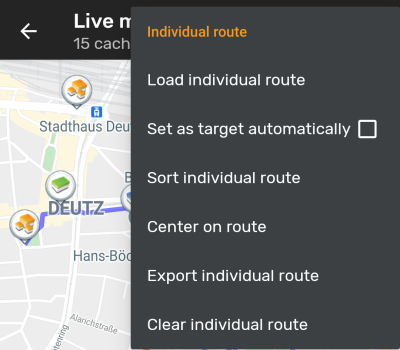
While you can add and remove caches/waypoints to/from your rote by long tapping them, there are also some additional functions, which can be found below the menu item Individual route in your map menu:
| Menu item | Description |
|---|---|
| Load individual route | Load a previously saved individual route. |
| Set as target automatically | If activated the routing start point will be set as direction line target automatically (showing the way from your position to the starting point of the route). This can be handy while doing a geocaching tour. Long-tap on a visited cache/waypoint will remove it from your individual route, and with this option activated, your next stop on your route will be set as target automatically. |
| Sort individual route | Will open a dialog, where you can modify the sequence or remove one or more of the selected caches/waypoints on your route; The route will then be recalculated accordingly. Don't forget to hit the “save” button to save your changes to the individual route, or just leave the dialog to discard them. |
| Center on route | Will move/zoom the map, so that an the individual route is shown completely. |
| Export individual route | You can export your created individual route into a GPX route file. |
| Clear individual route | This will remove the created individual route. |
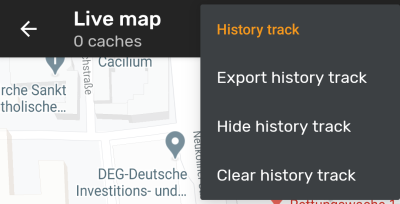
The history track provides a line of your position history (your movement) on the map. You have to activate the history track in your map content settings, where you can also configure additional parameters (such as maximum length of the track).
The default line color is black but the line color and additional appearance parameters can be configured according to your needs within the map line customization settings.
The example below shows the typical appearance of a history track line.
To configure the history track you can use the map menu items below History track in your map menu:
| Menu item | Description |
|---|---|
| Export history track | Allows you to export your position history to a GPX track file. |
| Hide/Show history track | Using this option you can turn the history track off/on. Turning it off will not clear the existing track but just stop recording and hide it. |
| Clear history track | This will clear the position history and thus remove the existing track. |
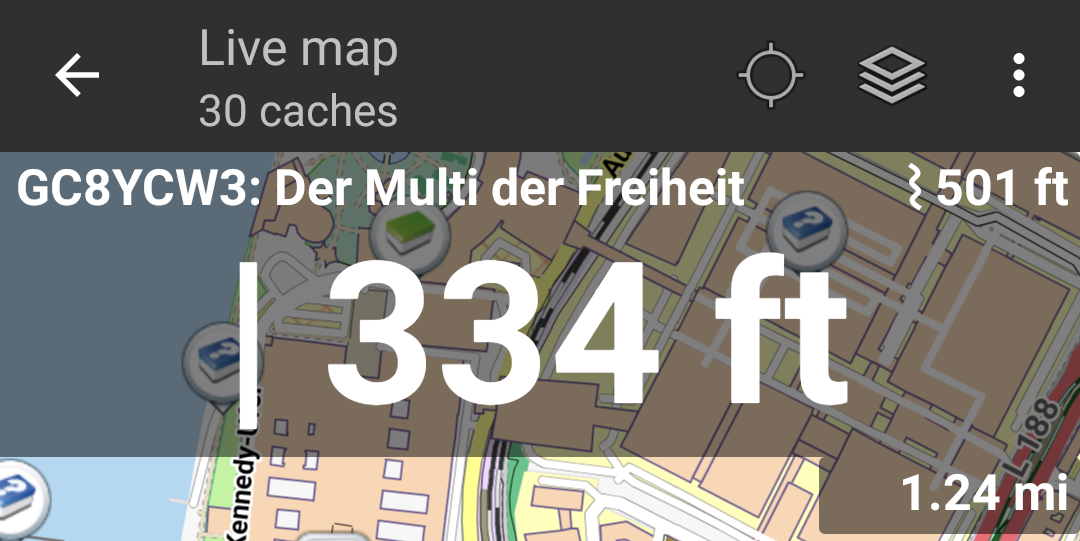
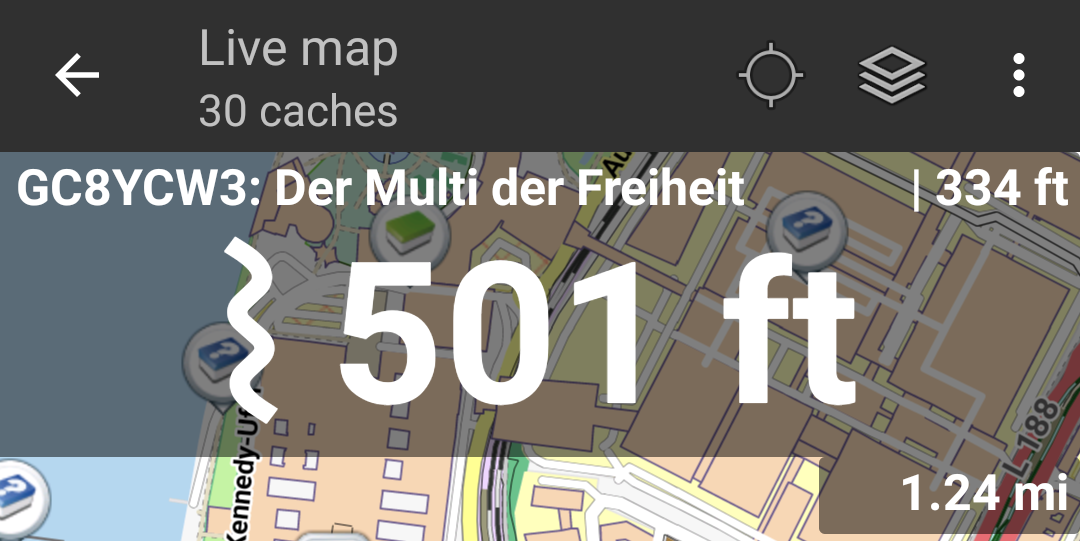
While using the direction line and/or individual route c:geo will also provide several distance figures at the top of the map (can also be seen in the dedicated screenshots above). The distances are shown in meter/kilometer or feet/mile depending on your settings.
Depending on whether you use one or both lines and whether you activated to show the straight distance in addition to the routed distance (only if Brouter is installed) in your map content settings several distance figures might be shown.
The picture below shows a combination of all possible distance figures. Additionally the chosen target cache/waypoint is shown on top left is the direction line is active.
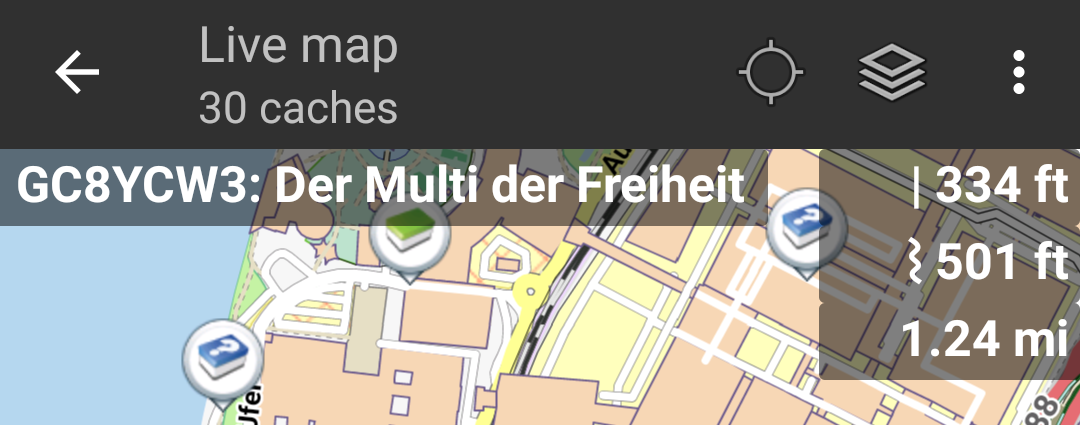
Some or all of these distance figures might be shown depending on configuration and active navigation lines:
For better visibility you can tap on the distances to supersize them and reduce them again. If straight and routed distances are shown each tap will let you cycle between straight distance enlarged, routed distance enlarged or normal view.